How it works
How to use VR.NDI
Eight steps from an open timeline to editing in the headset. Your computer sends NDI, the Quest picks it up over the network, and you choose how to wrap it.
Send NDI from your editor
The headset and the computer must be on the same local network. DaVinci Resolve has no built-in NDI output, so it uses our NDIOutput plugin (steps 1–3). Premiere Pro, Final Cut Pro and After Effects use the free NDI Tools instead: install them, turn on NDI output for your app, and skip to step 4.
Step 1Add NDIOutput to the timeline node
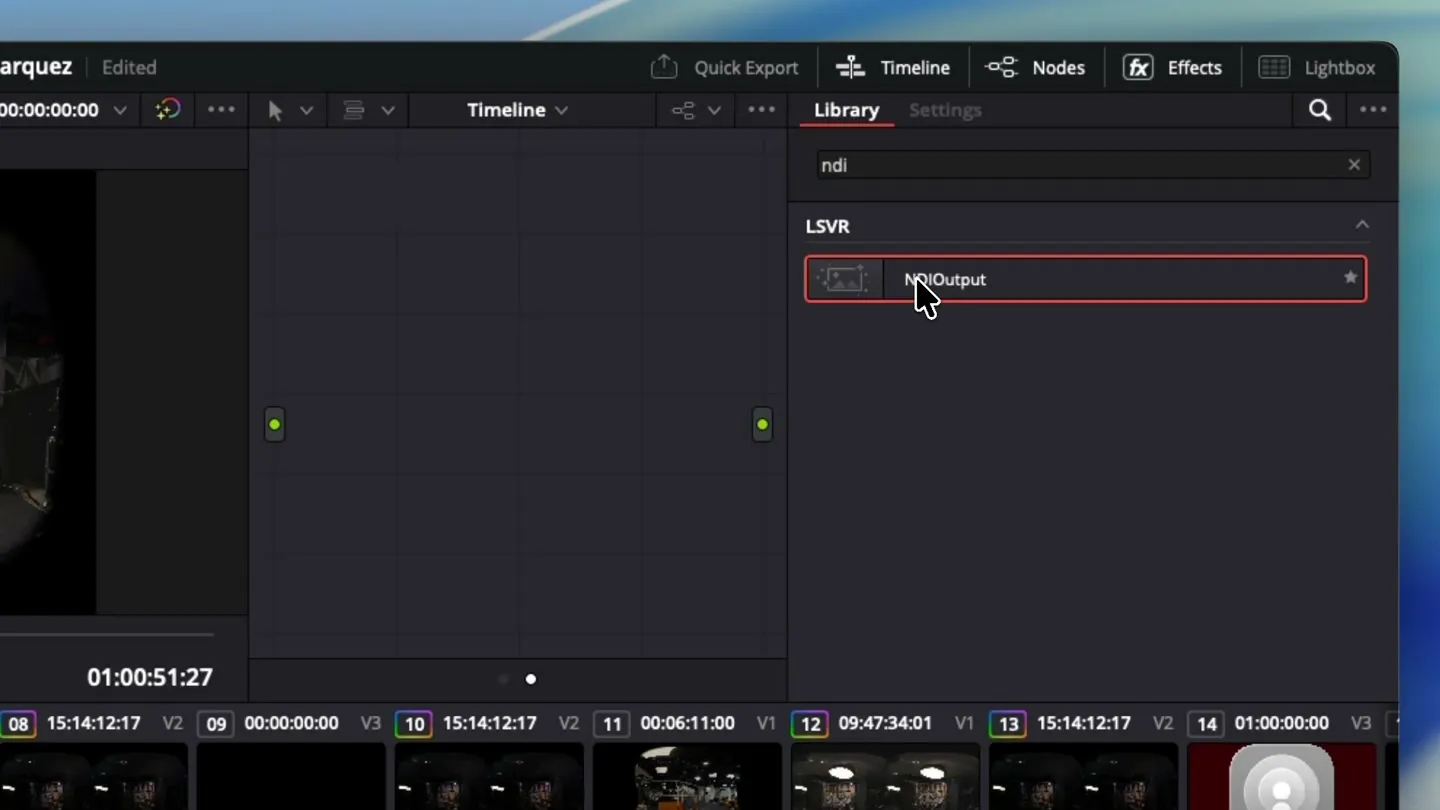
On the Color page, switch the node editor from Clip to Timeline so the output covers the whole cut. Open Effects, search for NDI, and drag NDIOutput from the LSVR group onto the timeline node.
Step 2Check the plugin settings
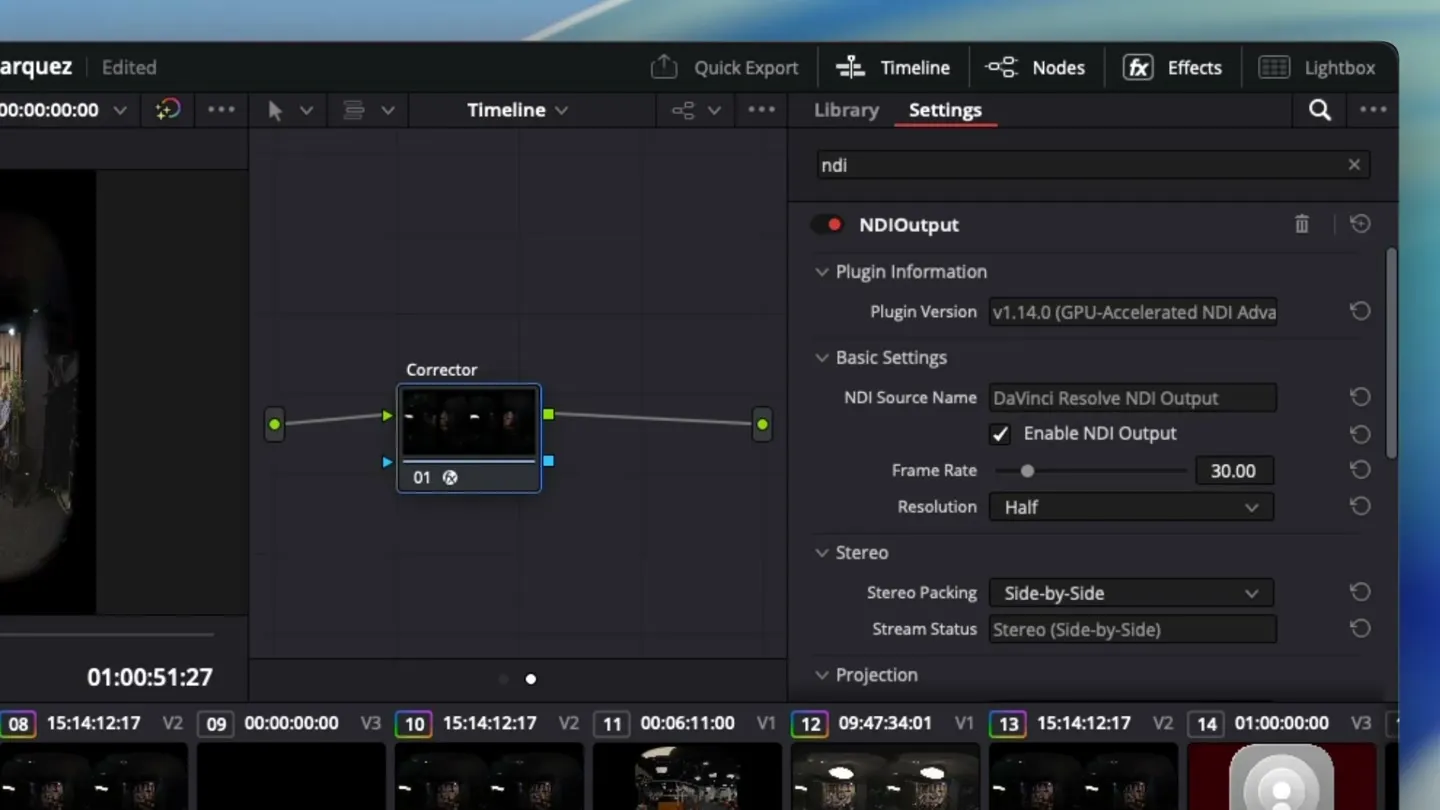
- NDI Source Name: the name the headset will list. Rename it if several machines are sending.
- Enable NDI Output: on.
- Resolution: use a 2:1 timeline. 4096×2048 plays smoothly on Quest; for 8192×4096, set Resolution to Half to keep the preview smooth.
- Projection: leave on Passthrough to send the frame as it is.
Step 3Stereo 3D timelines: send side by side
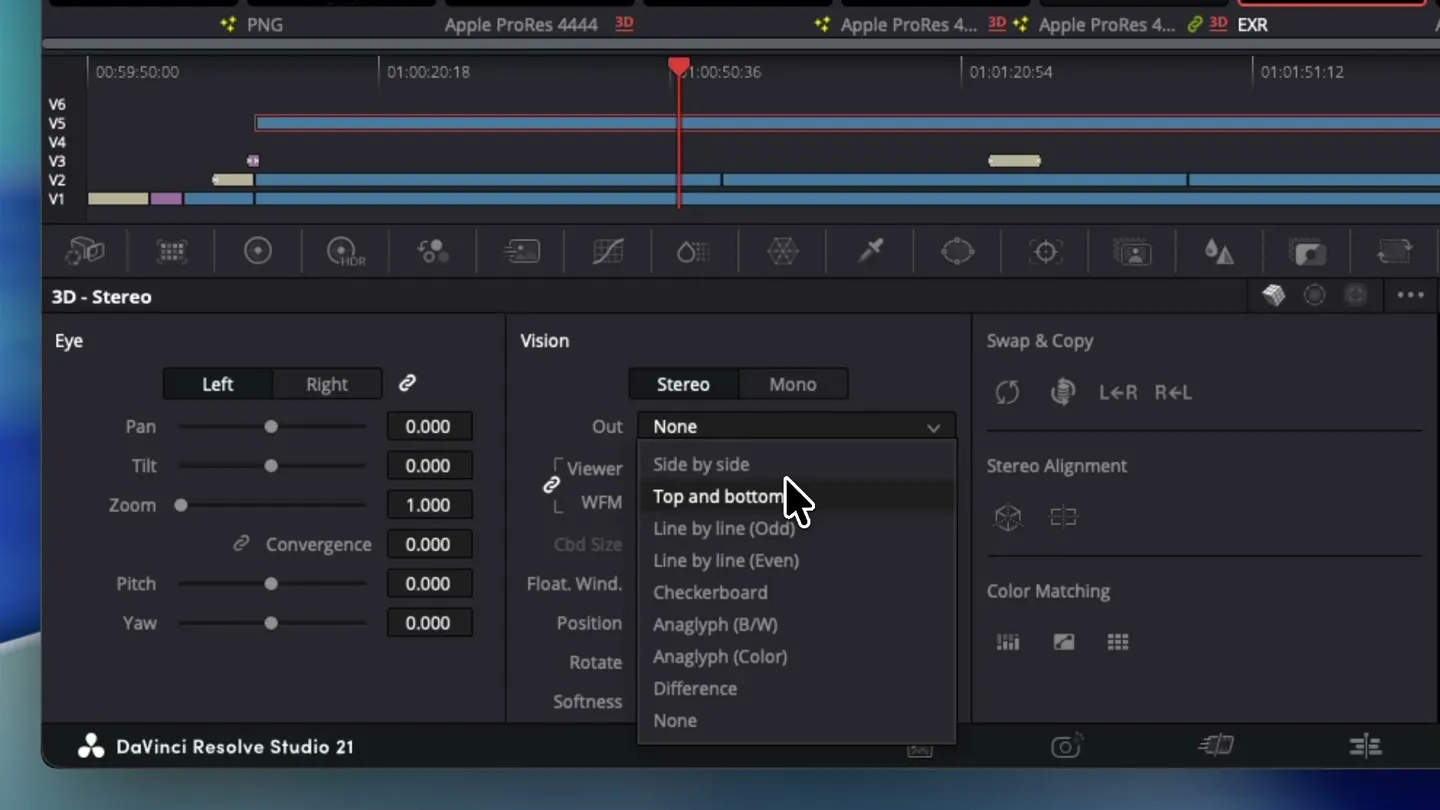
If your timeline uses Resolve's Stereo 3D with separate left and right eyes, open the 3D palette and set Out to Side by side. The plugin's Stream Status changes to Stereo (Side-by-Side). Footage that is already packed side-by-side in one frame needs no change.
Watch in the headset
Scrub your timeline once so the sender starts producing frames, then put the headset on.
Step 4Launch VR.NDI
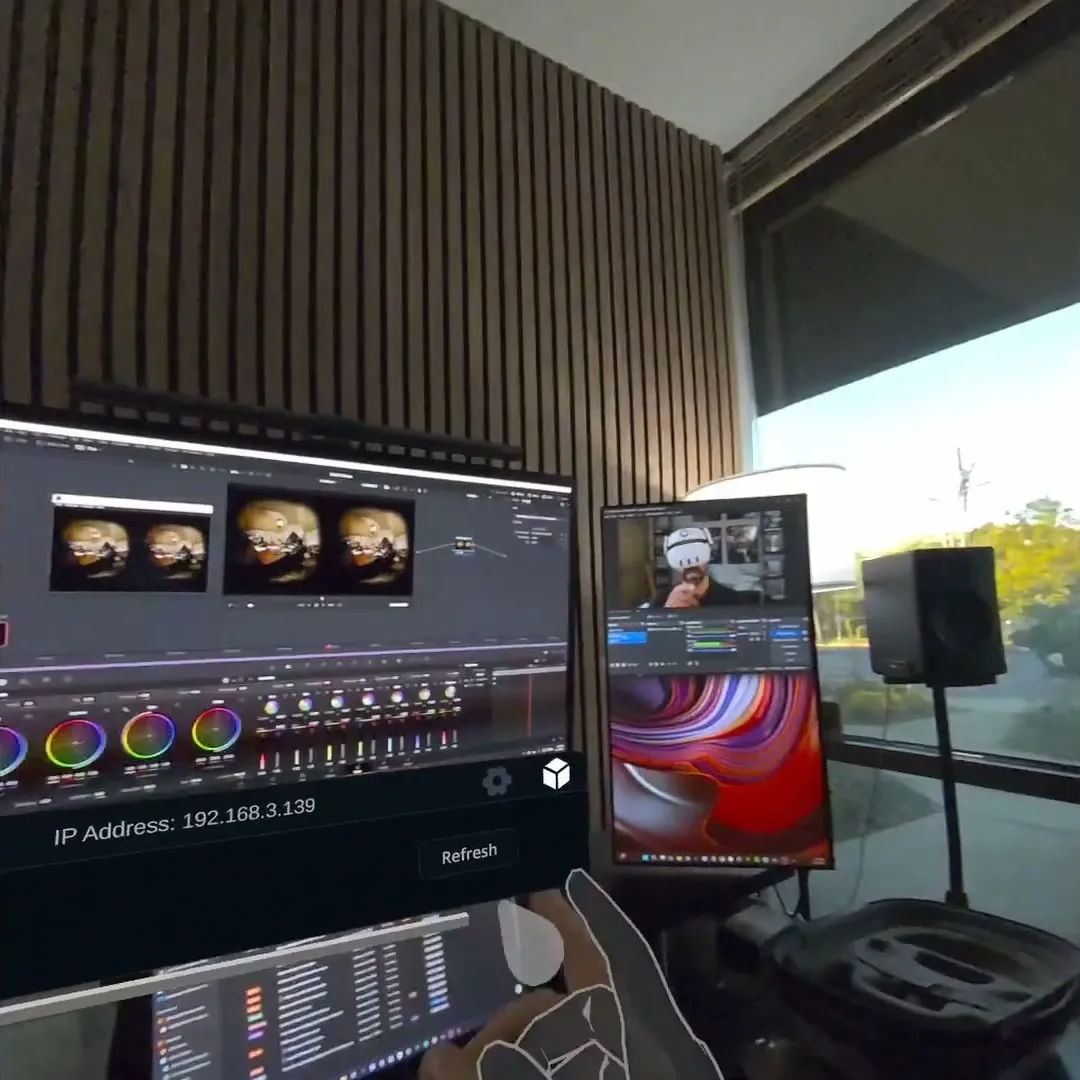
The connection panel opens in front of you with the headset's IP address at the top. Select the square icon to turn passthrough on or off, so you can see your desk while you set up.
Step 5Refresh and pick your source
Select Refresh to list every NDI sender on the network. Each tile shows the computer's name and the sender, such as DaVinci Resolve NDI Output. Tap yours and the picture appears.
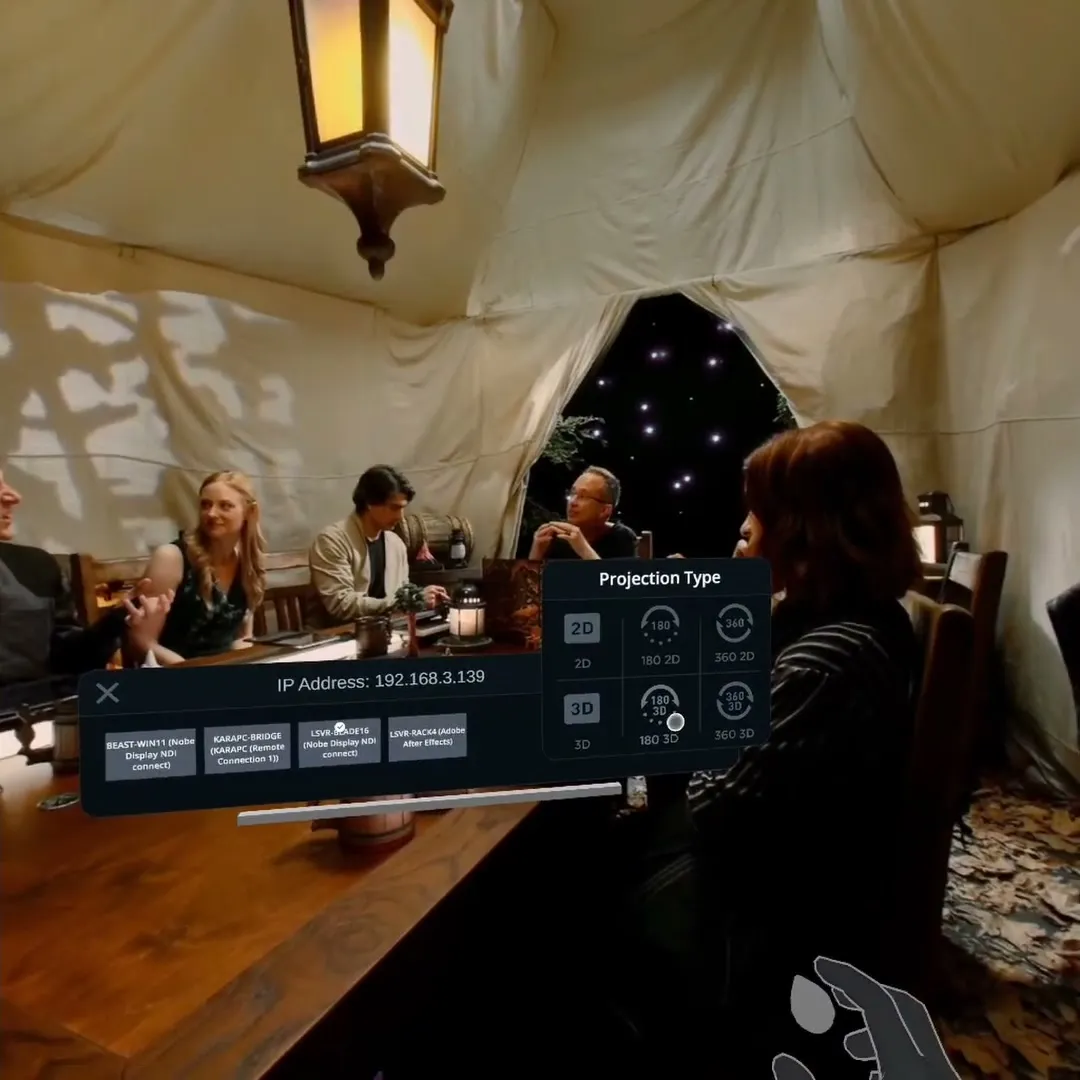
Step 6Set the projection
New connections open as 360 2D. Select the gear and choose the projection that matches your timeline:
- 180 3D for side-by-side VR180
- 360 3D for top-bottom 360
- 180 2D or 360 2D for monoscopic
- 2D or 3D for a flat window
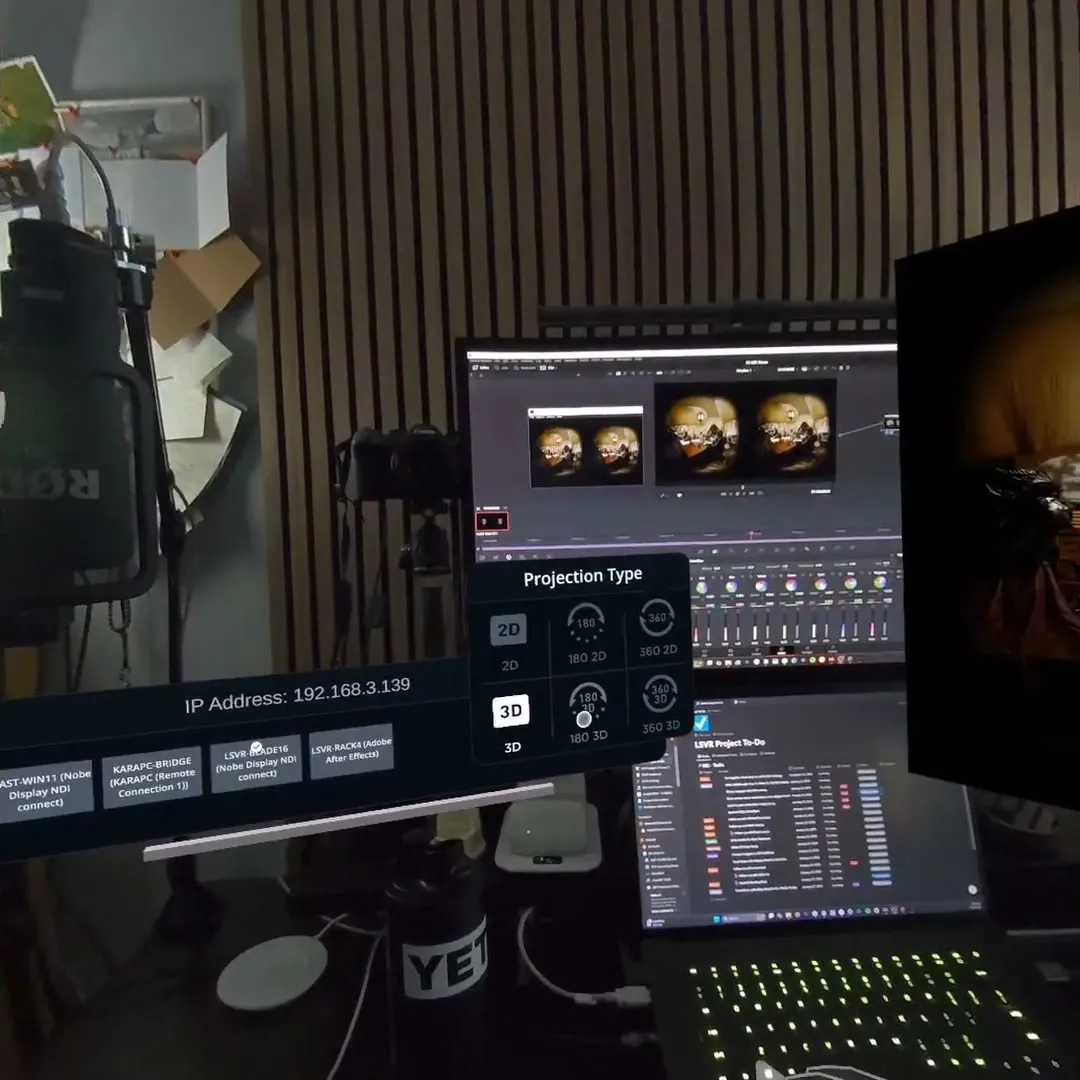
Work in the headset
Two ways to keep your hands on the edit without taking the headset off.
Step 7Use a window for flat and spatial video
The 2D and 3D projections open as a window. Grab it to move it, and choose 1:1 or 16:9 from Aspect Ratio. Pinch the menu button to show or hide the controls.
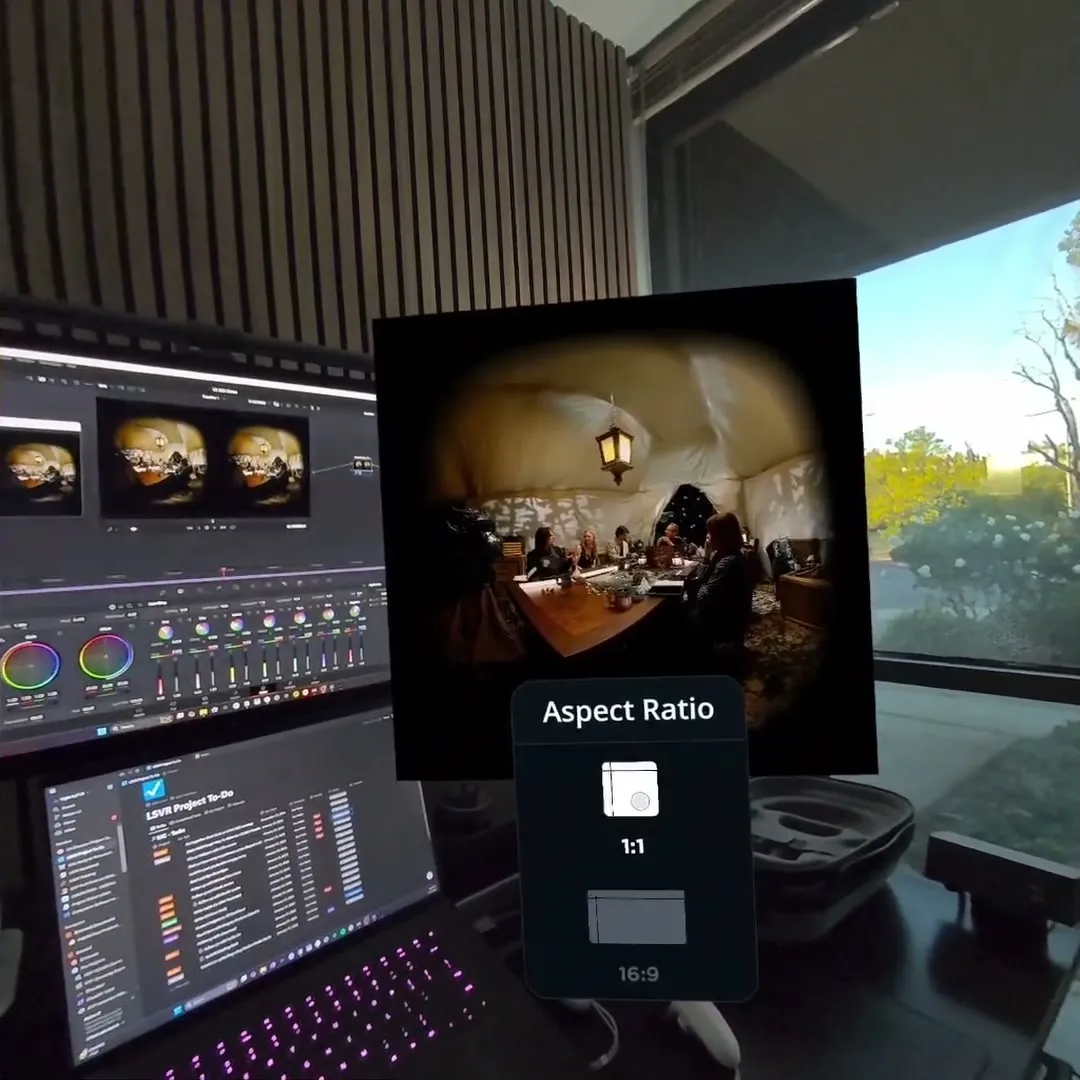
Step 8Dock your computer with Remote Desktop
Press the Meta button, open Remote Desktop and choose your computer. Make the editor full screen, then dock the window low in your view. Scrub and grade on the screen below, and look up to see the result in the immersive feed.
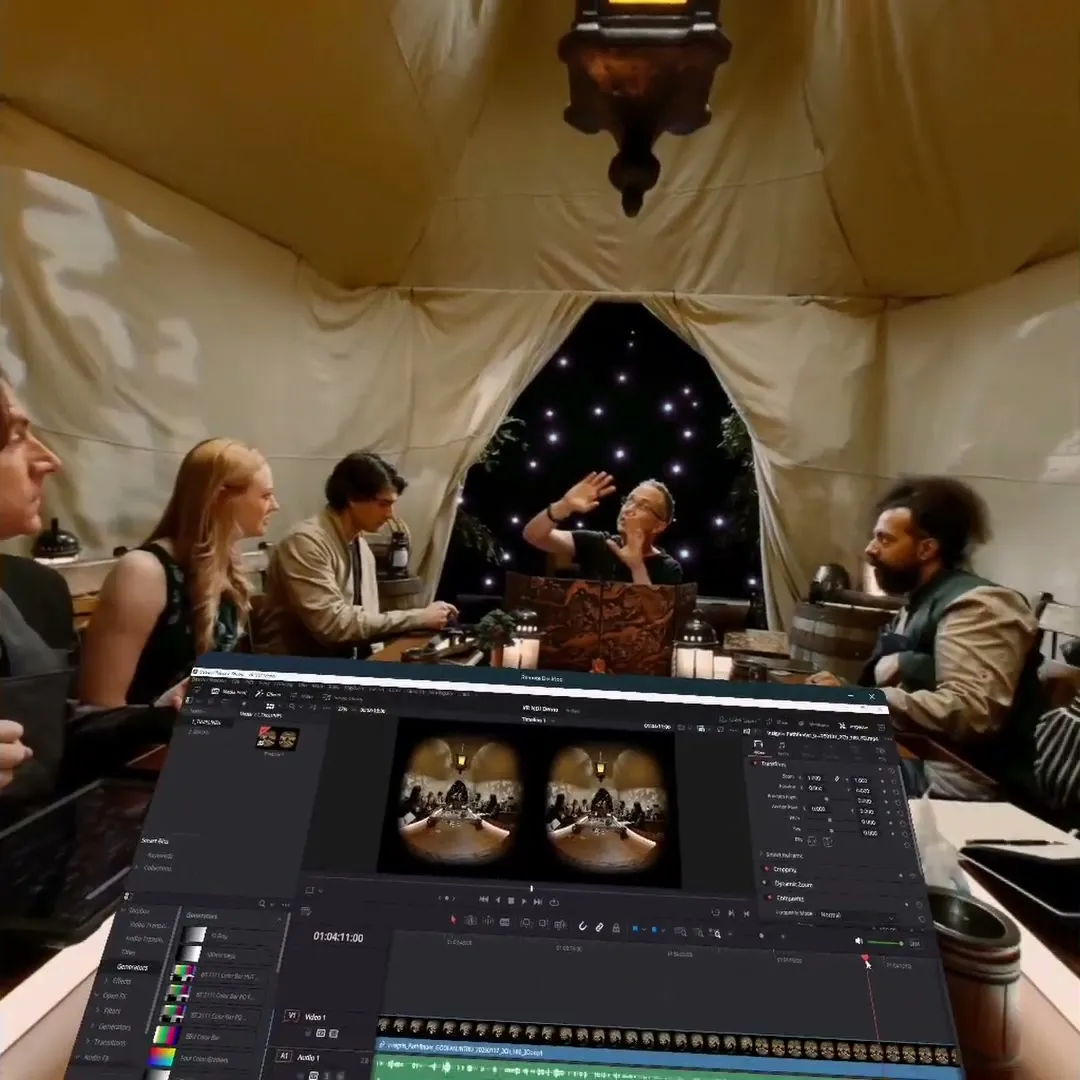
Prefer to watch?
Getting Started with VR.NDI covers launching on Quest, projections, spatial video and Remote Desktop in about eight minutes. It was recorded before the NDIOutput plugin, so its Resolve steps differ from the ones above.
Still stuck?
Email the team that built it. Include your headset, your editing app and version, and your timeline resolution. That gets you a useful answer much faster.